Monday, February 21, 2011

Day 21 – 20/2/11 Back to the rear

Saturday was a washout with rain, mist and cold so I went out on the town.  On the back of a cracking night out with Russ and a group from work I set about dropping the rear sub-frame assembly.  I removed the front bolts and the trailing arm fixings.  Then I removed the shock absorbers from the hubs.  I put the trolley jack under the differential and took the load and blocks under the front of the frame, then it was on to the final four fixings.

The first three bolts came out no problem the fourth one was tight but still turning with the aid of the ratchet extension.  I kept the bolt turning slowly but then there was a bang. Oh, Bugger! The nut that was welded into the frame had broken free on the bolt.  So it was spinning loose but no way to reach the nut. Been there, done that before. Out with the angle grinder and a cutting disk 2 minutes job sorted.
the free spinning bolt problem chopped down to size courtesy of the angle grinder


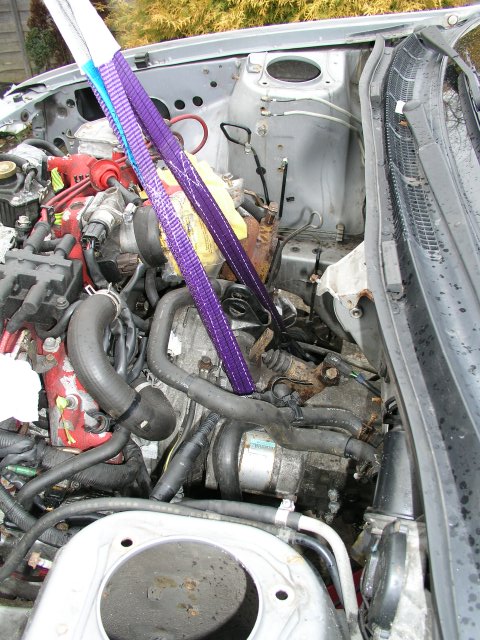
On the jack I slowly lowered the sub-frame to the point where the jack could go no lower.  Back under the car to remove the blocks and it was down.  I pulled the jack with the assembly on top out from under the car. Job done!  Then it occurred to me.  How was I going to get it into the garage? I could just about lift it one end of it my own without my crane.  Time to summon some muscle support.  I called Russ who said he would be round in 20 minutes as he was going out shopping.

Next it was on to the fuel tank.  I loosened one of the 2 tank straps and started on the second strap. One of the bolts was too corroded and the socket just destroyed the corners, and open spanner was no better.  I couldn’t get the angle grinder in so my only option was to drill.  Ten minutes later and the head dropped off and I felt the tank drop an inch.  I put blocks under the side of the tank and went back to the other side to release the first strap.

Russ popped his head over the fence.  He had brought his wife Claire with him who seemed a little tired still from last night.  I don’t know what time they finished but I’d left at 1am and it was still going strong.  We pick up the sub-frame and walked it round in to the garage.


I went back to the fuel tank.  I was about to drop the tank when I noticed the pipes down the side.  They were the fuel pipes that run down the inside of the car to the engine bay.  But the flexes are connected to the tank through a pipe fitting that was fixed to the tank which you can’t get to without dropping the tank.

Tech Tip: When working under the car, especially on fuel pipes, it is definitely a good idea to wear eye protection.  As annoying as it can be, wearing eye protection when flat on your back under the car with years of dirt, rust, and other detritus inches from your face is not a bad idea, primarily because you can’t move out the way quickly enough. But when dealing with pipes with dregs of fuel in definitely do so.  I ended up accidently getting fuel in my face twice and was very glad of the protection of safety glasses.

Flexes clear and I was able to release the second strap.  And the tank was free.... Unfortunately, not wanting to drop the tank literally, I was under the car at the time and found myself with the tank lowered onto my chest. I was delighted as this was the last major part of the donor car to remove.  A small milestone achieved.

Then, you know when something dawns on you? You get that sudden realisation that you made a well intentioned screw up?  Yup! I made it.  I was laid under the car with the petrol tank, probably a couple of litres of residual fuel in it by the way it swayed, sat on my chest and no way to get either myself or the tank out from under the car. Muppet!

I ended up effectively walking on my shoulder blades, laughing to myself and pushing the tank back to keep it in position and eventually with the tank resting on my shins the tank was low enough I was able to drag myself and the tank out from under the back of the car.  Job done. I think I am now up to chapter 2 on the CKC build document.

Day 20 – 18/2/11 Do cranes fly south for winter?

Because I’m thinking mine has flown the coop.  I called the place I got the crane from and explained the problem.  To their credit they agreed to send me another jack unit and this morning it duly arrived.  I got home, mounted it in the frame, and....  It wouldn’t lift the arm.  Doh! I lifted the arm by hand and it held solid indicating there was oil in the cylinder.   I couldn’t believe it, the same problem? It looks like it. I double checked the release valve, it worked and wasn’t leaking.  I sent them an email directly explaining what I had done. They responded an hour later agreeing to send another next week. I hope they test this one before they courier it.

I still had an hour of daylight left and with the weather looking distinctly poor for the weekend so I headed back out and worked on the remaining nuts and bolts holding the rear sub-frame and suspension to the car.  After the problems of shearing bolts and rounded nuts with the rear anti-roll bar I wasn’t looking forward to the remaining fixings.

However my apprehension was unfounded and with a little help from the make do ratchet extension I was able to crack the remaining nuts and bolts before night fell.

Monday, February 14, 2011

Day 19 – 12/2/11 Titanic Triple Screw of Frustration

Having recovered from yesterdays deluge of muck I set about the removing the anti-roll bar.  The hub ends of the bar were no problem but the mounting brackets and bolts are badly corroded and three of the four bolts sheered under the ratchet socket. The fourth proved highly troublesome.  The socket and spanners just kept slipping. I borrowed and cold chisel from Carl to try and knock the head off but all that did was make a bigger mess of the bracket.  I was able to swing the anti-roll bar around and with some mole grips managed to get the bolt turning.  But then i noticed a small access hole beside the bolt head.  I put my finger in it and felt the nut on the other side turning with the bolt.  Bugger! Then I notice I had torn on side of the bracket mount. Next time use the grinder that’s what it’s there for.

Back on to the plastic pipe guard and this time I gave up on the bolts and cut/tore the mounts free.  The guard, now removed revealed, a fixing that held both the filler and breather pipes in place.  It was also covered in road dirt and badly corroded.  From my previous experience with the anti-roll bar I decided to leave it till last.  I undid the Jubilee clip and removed the flexible pipe connecting the filler to the petrol tank, then went to work on the Filler point itself.

Three screws all looked clean and shiny, and I stupidly figured take them out and I would be left with the one badly connected fixing in the wheel well.  The reality was the three screws were shiny on the top but in the wheel well they were badly corroded. The first one wouldn’t budge at all the second came half out and seized so bad I couldn’t turn it either way.  The third screw turned marginally.  I went to town on the backs of the screws in the wheel well with a wire brush and some penetrator/release fluid and managed, after much coaxing and some time, to release the third screw by turning half a turn and then back a quarter, add bit more fluid and repeat.  The first and second screws still wouldn’t budge.

After a bit of thought and numerous attempts I took a hacksaw blade and in the wheel well cut the threat off on the top of the fixed nut. I tried the screw driver again and behold it moved and with a bit of coaxing and release fluid it came out.  Two down one to go.

The second screw just would not budge. Half in, half out, seized solid and in true amateur mechanic style I knackered the Philips head so nothing could get a purchase on it.  I was about to take drastic measures when Russ put his head over the fence.

I had asked Russ to pop round to give me a hand fitting cross braces on the trestles holding the tub up.  He also wanted to see what the car looked like.  We lifted the tub off the trestles and put it on the floor and marked up the ideal gap between trestles adding an extra 100mm for the existing timbers 1150mm. Then we drilled the fixing holes based on the holes I had already predrilled in the posts and fastened them up with stud bar.  They were solid.  I’m not going to say they could hold a tank but they are more than substantial enough for the job, and solid as a rock.  We put the tub back on the trestles and, after a coffee and a chat, Russ left me to it and I went back to that last ruddy screw.

The only option left was to drill.  Not a pleasant thought, but there wasn’t enough thread left to hacksaw off on the back of the nut.  So it was out with the battery drill.  I applied some pressure and the drill bit into the screw sending hot swarf all over the open fuel filler...... A sudden recollection came to mind.  That of a guy at work how was welding on or near a petrol tank which he had previously emptied and it had promptly went BOOM bending the floor pan of his car and subsequently reducing the whole car to scrap metal (Fortunately he was unharmed).  At this point I decided to fill the filler tube with something distinctly less flammable and continued drilling.  Once through the head, job done, I decided to drill out the badly corroded middle fixing which worked a treat.

Success - I removed the pipe... Carrying it to the garage I tipped it up and a load of fuel spilled out on to the floor.  So even though I had disconnected it from the tank there was still fuel inside the pipe... boy was I glad stopped put a stopper in the top when I was drilling.

Kim, who had been ill recently hence her absence, popped round to have a look at the kit and to discuss the next few jobs and what she would be able to help out with.  There were to top mounts for the shocks which I was going to need off the old units to mount the new units on.  Kim said if I brought them to college one day she would use the spring coil clamps to dismantle the coil over shock systems to retrieve the parts I needed. We also discussed numerous other jobs and the tools I would require.  Once Kim had gone I went back to the breather pipe which offered a challenge in that it was heavily rusted.  It took some manipulation the get the rubber breather pipe to the top of the fuel tank off and then some more cursing as I finally managed to free it from the car.  I’d had enough by then and I had recorded the six Nations games earlier so I called it a day. 

Day 18 – 13/2/11 Been down the pit?


Got home on Friday afternoon and went straight on to the car for an hour or so. Plan is to get the rear sub-frame out this weekend. First stop the fuel inlet pipes.  They are covered by a plastic cover in the rear wheel well.  The plastic cover is also holding back about 12 years of road muck.  The dirt has taken its toll on the metal work thinning the plastic covers fixing brackets to the thickness of paper and completely solidifying the nuts and bolts.  I dug out all the muck with a screwdriver and tried to undo the fixing bolts.  I was still working on the two fixing bolts when the garage flood light came on and I realised it was dark. The corroded thin brackets and the lightweight plastic cover made trying to get a solid grip on the bolts impossible the top one kept flexing and the lower bolt was spinning but not coming out.

The bottom of the plastic guard is hooked on to the fuel filling pipe.  Frustrated I bent the bracket and pulled the bottom of the guard away.  The guard sprang free and deposited what I can only describe as a large handful of muck into my face.  I rolled out from under the car coughing and spluttering dirt in my eyes up my nose in my mouth and ear.  I had enough for the day and packed up.  When I got in I looked at myself in the mirror I looked like Jeremy Clarkson after he’d done London to Edinburgh on the footplate of a steam loco.  A beer to swill the grit out of my mouth is the order of the day.

Tuesday, February 8, 2011

Day 17 – 8/2/11 D-Day

Graham will be arriving early afternoon in the mean time I popped back to my parents place to pick up one of the first tools I ever bought.  A sump spanner.  The engine has a sump plug that you can undo with a socket.  The gearbox has a sump plug you can undo with a socket.  So why do you need a sump spanner to undo the rear diff sump plug? I got back and set about lowering the front of the car back down to an acceptable level.

The crane, although it won’t lift, it will hold any load I put on it.  So I decided to use it as a safety support.  I used a block of wood and the trolley jack and the metal work I used to lift the car yesterday and raised the metalwork up on the jack to meet the car.  I took some rope and wound it through the holes where the springs used to go several times and hooked the rope on to the crane hook. When the jack took the weight of the car I took the axle stands and lowered them down to the lowest setting.  Then very cautiously I began to lower the jack until the crane took up the slack on the rope and then lowered the crane so the car sat back down on the axle stands.

Then I tidied the garage making it ready for all the toys Santa Graham is bringing me.  Garage prepared, I put the back end back up on the axle stands making it ready to drop the back end out of the car.  I heard a diesel van out on the road looked over the fence to see Graham in his van.  Not a bad six hour run.  And there was my baby tied to the back of the trailer.  We had a coffee break and then back to the work in hand.
Graham drove the van and trailer round to the garage and backed it up to the garage door.  We unstrapped the tub and carried it into the garage and put it on the trestles.  Alright so it took two attempts.  I still have to cut and drill the trestle cross members to make it stable enough to work on, but for now more I need to see the rest of the kit.


First out the van the Front end Frame, then few small boxes. One contains the AST coil over shocks and they look so much better than the ones I took off the Scooby.  They were also the first time they have been fitted to a Murtaya.   Another box contains all the nuts and bolts I will require not to mention screws, P clips and ty-raps.  One small box contains the new handbrake, an MG Rover handbrake? Then one last huge box contains the Roll bar, a bag of HEL stainless steel Kevlar effect flexible pipes for brakes and clutch, and all the fixing plates and bracketry required to assemble a rolling chassis.

I couldn’t help thinking there should have been more but then there is all the equipment I have been stripping out of the Scooby for the last month.

We chatted about various aspects of the build and I asked various questions. There were a couple of questions that escaped me like why do we need to use the interior lighting? And I have yet to see a Murtaya with standard Impreza side indicators so are they just ignored by the builders in favour of custom option?
Graham left with another six hour journey ahead of him. I now had a chance to look over the tub and other equipment.  The tub had been sanded down for the most part to take the gelcoat shine off.  Graham explained that this makes it easier for the resin to cure.  The better the curing the better the paint finish/ easier it is to paint because any "trapped" solvent in the rersin gets evaporated.  If trapped solvent is present when spraying it can affect the paint finish.


One idea Graham suggested is once I have a rolling chassis, before the engine and wiring are installed, is to have the car “baked” in a spray booth for a couple of hours and then primed.  This sounds like an idea but I would probably do it when I get the second part of the kit with the boot, doors and bonnet.  So I would need to find a sprayer first.

Day 16 – 7/2/11 Engine out or bust

Fresh start, the wind was howling everywhere fences rattled, some eventually yielding to the wind.  The clouds were dark, but at least it wasn’t raining.  I took the car cover off and lowered the back of the car down onto the rear wheels.  Then I placed the trolley jack under the gear box mount and raised it to take the load and undid the gearbox sub frame fixings all of which came off with surprising ease.  My Uncle then turned up to take a fridge and freezer I needed rid of to make space for the Murtaya parts arriving with Graham and the tub tomorrow.

Fridge and freezer gone it was time to crack the nuts on the last sub frame.  I went though in my mind what I was planning to do and in explicable I decided to take the front anti roll bar off. It just seemed like a good idea and one less thing to worry about.

Having already attached the crane on the engine just as Graham had described with a shackle I lifted the crane to take the load and unbolted the four final fixings on the sub frame with the aid of my shopping display ratchet extension. Okay that was easier than I’d thought.  I put some blocks under the sub frame and slowly lowered the engine down onto them.  I unhooked the engine and pulled the crane away. First stage a success!! Engine and car separated.


Next I took the Passenger door off and put the crane arm into the car and lowered the hook down to where the gear stick had come up through the central tunnel of the car.  I took two pieces of the shop display and wrapped a strop around them a couple of times and put it under the car passing the ends up through the hole in the centre tunnel and fastening the ends to the crane hook.  I was then able to lift the front of the car as high as I could mount the front axle stands. Then I was able to go back to the engine sat on blocks.  Somehow I need to lower the engine further and slide it out from under the car.


In the CKC build document they lowered it on to a sheet of plywood and pulled it out with a Rover. So I’m thinking how am I going to drag the engine by myself?  It’s not the dragging that concerns me.  It’s the 8 inch high ramp into the garage that concerns me
   
So I spent the next 2 hours working out different potential ways of getting the engine out from under the car and getting it up the ramp.  After numerous attempts I was almost ready to call it a day and get graham to give me a hand tomorrow. Then I twigged that it I put the crane under the car and rested gearbox on one leg and used the arm to lift the engine slightly so it was just off the floor I could move the crane, engine et al a few inches so that the front part of the engine was clear I then lowered the engine and re-slung the strops and chains and lifted again. Pulling the crane again I got another few inches. Again I lowered the engine and re-slung the chains and lifted.  This went on repeating the process until the chain and strop were outside the engine bay.  That was it. Second stage a success!!  The sun came out, blue skies, the gusting wind was a gentle breeze and all seemed right in the world.

The third stage of actually getting the whole kit and caboodle into the garage now seemed something that would require some physical muscle.  I contemplated calling a couple of friends to see if they could spare half an hour on their way home from work as it was now gone 3 in the afternoon.  But I thought lets just see if I can get the back of the crane on to the ramp.  I managed it, Okay now lets see if I can get the back of the crane up the ramp. Success! Get the first set of three sets of wheels over the garage door wash guard? Yup! By now I was getting tired out but was so close. The next couple of steps were similar, basically brute force and leverage with a piece of 3x2 timber.  But the engine and gear box were now in the garage. Job Done!

The only down downside was when I tried to lower the car back down to a reasonable height on the axle stands.  I repeated the same procedure as I had to lift the car, but the arm wouldn’t lift.  It would raise without load but as soon as the load it stopped lifting.  I think I might have stuffed the hydraulics, but on the whole a successful day.


Tech Tip: After removing the engine on my own I can recommend one thing. Don't Bother!  Phone a friend! And if you haven't got a friend just find someone who bares you no malice.  I was exhausted by the end of the day.  I'm not confident moving such a large heavy piece of hardware.  It took me the best part of six hours simply because I was being ultra cautious and I was not about to put myself or the engine at risk.  With someone there to help it wouldn't have taken much more than an hour or two to achieve the same result usually followed by a very enjoyable beer.

Day 15 – 6/2/11 A Teasing Puzzle


Today was a quiet day I was planning to drop the engine but the plans very quickly shuddered to a halt. First problem how to fix the crane to the engine and gearbox.  There are no plans, or reason, to split the engine and gear box.  Putting a strop around the gearbox wasn’t a problem but the fixing on the front of the engine was a different story.  I did try a strop that looped under the engine through the sub frame and up the front of the engine.  But I was concerned because the front of the engine is all plastic timing belt cover.

Shortly after that I realised another problem.  The engine is massively wide and the legs of the crane extend under the car and although they would be sufficient for a normal in line or V configuration.  It don’t work for a flat four!  If I lower the engine it lands on the legs and I can’t pull the crane out to lift the car up to slide the engine out.
 
I don’t want to lift the whole car and engine up too high for fear it would be unstable on the stands with all the weight even with the back wheels on the ground.

I stood there for over an hour pacing round the car trying to come up with a solution. I was playing with blocks under the car, had a sandwich and call my mates and told them to hold off on the assistance. It was like one of those car park puzzles where you move the cars back and forth till you can get your car out of the car park.  I could see there was a solution but I just couldn’t figure out how I was going to lift the car and with engine sat on the legs.

Then it hit me I didn’t need to have the crane in front of the car.  I could use the crane on the side of the car and then I could pull the crane out and lift the car from the inside of the car.  I’ll explain in the next post.  It was too late to start anything so packed up for the day.

I sent Graham a quick email to ask him about crane mounting points on the engine.  I added a few photos with the strop I had looped through the sub frame and up the front of the engine.  To my surprise he rang me a few minutes later (that’s what I call service) he was finishing off the White car which does look stunning.  Graham agreed with my concerns and told me that the alternator mounting bracket is the front crane attaching point.  Armed with this information I was ready to have another go tomorrow.


Day 14 – 5/2/11

Last night the wind blew gale force and I came down this morning to find the car cover had all but been ripped off the car.  I pulled it back on as best I could, but the weather was against me dropping the engine. So it was back to cleaning and painting.  I had to de-rust the fan mounts again (shouldn’t have left them in the garage) and this time it was warm enough to spray them with the Hammerite rust protector.  Then I cleaned up the front lower suspension arms using de-greaser and a wire brush

Day 13 – 4/2/11 Bigger Spanner

Finished work early to spend the last few day light hours on the car.  I need to create more torque to undo the nuts and the half inch socket set although better than my own I’m still not able to compete with 12 years of exposure to road elements and installation with air powered tool.  I am at risk of toppling the car off the axle stands heaving on the ratchet.  I looked around to find an extension tube I could fit over the ratchet.  It took a while but eventually I found a piece of shopping display rack that was heavy enough to do the job. The piece was five foot long which was too long for the job but it was enough to slowly and evenly apply the torque on the nut and the nuts started coming off without issue.  Now I was able to drop the aluminium lower suspension arms and remove the shocks and springs and tomorrow, with the help of a few friends, i should be able to lower the engine and gear box.