Wednesday, May 18, 2011

Day 37 – 11/5/11 - On to the fuel tank

I received an email from Ben today with the layup details for the steering column hole in the front bulkhead.  I checked my steering column and confirmed I need a 53mm hole cutter pity I only have a 51mm cutter.  I’ll see if I can borrow one.

Dan popped round to give me a hand for a couple of hours to finish off the trimming down the roll bar nuts. I showed him the rear sub-frame problem I also noted the exhaust mounting bracket will also foul the tub by 1-2 mm.  I figure I’ll grind the metal back a bit and then see how it fits.  Shame to cut the dry powder coating but I’d prefer to cut the metal back and touch it up with some POR15 than start hacking into the resin and risk breaking into the foam.

We then pulled the fuel tank straps out of storage and held them up to the predrilled holes. The front holes are cut M6 but the provided bolts are all M8.  I drilled out the holes and moved on to the back holes.  These holes were drilled M8 but not drilled through to the other side of the tub.  I had to extend the drill bit in the chuck to actually drill through to the other side.
 
Now we got the fuel tank out and a bag of new fuel pipes.  I was about to remount the metal fuel pipe assembly that takes the fuel feed, return and vent lines from the top of the tank to the side where the new pipes would connect.  I pulled the coils of pipe out of the bag.  Ah! Now I see a problem or rather don’t see.  There are three lines on the tank and only two pipes.  I laid the pipes out and they were of equal length (3.5metres).  I went back to the delivery list, Yup! 2x8mm and 1x6mm pipes each 3.5metres. I’m a pipe short.  There was also another issue.  The main fuel feed pipe wasn’t metal it was actually plastic. The end had a 2 part connector (with a push,squeeze,release action) that would not fit the new fuel pipe in a month of Sundays.  I had a look in the car builder solutions catalogue and was unable to find anything like it.  I had to send photos of the rear sub-frame holes to Graham and Ben and I gave them an update and requested a fuel line.  Ben also asked for some photos of the rear sub frame holes which I sent.


Day 36 -8/5/11 Roll bar and Rear Sub Frame

The seat belts have turned up and thankfully they are substantially smaller than the donor cars.  I boxed them back up and stashed them away until I need them later on in the build.


Back into the garage and it’s time to play with something new fibre reinforced bonding compound.  I gave a friend Mark a call to give me a hand to line up the roll cage.  Whilst waiting for Mark to turn up I set about checking the other fixing plate locations.  The trailing arm and dif nose mount are fine but the rear sub-frame needed some work with the Dremel to get the holes to line up I manage to get the driver’s side no problem but the passenger side was a different problem. I managed to get them lined up laterally but longitudally one of the holes was about 12mm out and they are only 14mm diameter holes.  I dug the bolts out of the box and offered the rear sub frame in place.  The drivers side was no problem but the passenger side I was unable to get the sub frame bolts go in more than a couple of inches.  After that the bolts fouled on the bushes.  Closer inspection revealed that the Predrilled holes were not square to the tub. Bugger!  This will take a fair amount of fettling and the dremel won’t be any good because it won’t extend deep enough into the tub.  I put the heel bar tight in each the hole and held a square against it.  It wasn’t just one hole it was both and they leant into one another like the verticals on a trapesoid.

    
Mark turned up and I switched back to the roll bar.  After a bit of discussion we clamped a metal bar across the back of the door frames (as shown in the photo) and tried to get the roll bar equidistant from the clamped bar.  Then marked the round the feet positions.  Now because the layup isn’t a smooth surface trying to get it aligned right and set in a position whilst the bonding sets was going to be a problem.  I decided to drill two holes on the rear feet to hold the roll bar in position we required whilst the floor pads cured.  Previously I had followed Bens instructions and covered the feet with the metal reflective tape. Then I made up a batch on compound and laid it on the marked out floor pad areas and mounted the roll bar fixing the two rear pad bolts in hold it place to. I then cut away the excess compound.


45minutes later the compound was hard, and the heat generated from the reaction between resin and hardener had dissipated.  We unbolted the two rear pad bolts and after marking the fixing hole centres with a firm shove released the roll bar from the grip of the bonding compound.  I drilled the holes on the foot pads and then mounted the roll bar and to check the hole alignment.  AH! There is a problem.  According to the Nut and bolt assembly all the fixings are 10mm.  But the floor plates of the roll bar are 8mm holes.  Not a major problem, I acquired a step cutter bit from the car show. A great tool when you are drilling holes in plate metal. I ran the bit through each hole, problem solved.

I mounted the roll bar again and dropped in a couple of M10 bolts into each foot just to check the alignment. No problem.  Mixed another batch of compound and repeated the previous procedure.  I used a little less hardener this time because the curing on the first batch was a bit fast. I left it for a couple of hours but eventually it was hard.  I removed the floor bolts and marked the rear hole centres and with a couple of good shoves released the roll bar and drilled the M10 holes.
I tidied up the waste on the edges with the Dremel, dropped in the all the bolts and located the underside plates.  The Dremel came into its own again just to clean a couple of the drilled holes so the bolts all lined up with the holes in the plates.
 
I tightened the nuts up so the plates were flush with the tub and marked up where the bolts would need cutting back so they won’t foul the fuel tank.  However the Nyloc nut wiped the mark away so I had to count the threads.  It was getting late so we called it a night.

Day 35 -2/5/11 On with the Show

Last day of the bank holiday and I had number of questions for Graham and Ben.  The National Kit car show was on at Stoneleigh Warwickshire.  So I took a day trip down to the show and meet up with the lads on their stand.  I had also arranged for Ben to bring the modified parts to the show so I can pick them up.

The show was brilliant. It is the third time I‘ve been and the more you dig talking to the owners, the more you learn.  This time the sun was out, sky was blue, breeze was up and down.  There was an awesome array of cars coming and going.  I wandered round the “paddocks” as the cobra and seven replicas cruised in along with other replicas Ferrari, Lamborghini, Porsche.  Some seriously looking “the business” some modern, others classic.  There were Vintage replicas, tri-wheelers, 4x4s, a few American hotrods, oh and a Jaguar XJR15 (for sale - if you are interested?).  Then there are the serious light-weight high-power machines Ultima, Cobra replica, Sevens and replicas, Hawks (the Lancia Stratos replica) all running a variety of engines from bike straight 4’s to large V8 muscle with a smattering of superchargers and turbos.  Each car having been lovingly built and cared for.


Bentley nope this is a Toyota Supra + a few £K in body panels


This would have been my second choice after AMS went bust


This is a Genuine Jaguar XJR15 ....and for sale if you have a few quid

This doesn't really look like a Volvo


Awesome Paint job

Not a Genuine Ferrari in sight


Such a pretty car I thought that when the race series was alive and kicking when Mansell and Piquet were fighting for the lead in F1


I spotted what I thought was the midnight Blue Murtaya I had sat in on the Arden stand a couple of years ago but it turned out to be the Gulf car (light blue and orange) that had been resprayed.  


It was up for sale....If you are interested.


The next area was the vendor stands with every conceivable tool you could wish for.  Not to mention the array of car components from clocks to door handles headlights to fuel tank repair kits and consumables.

I entered the first of the two main exhibition halls where the kit-car manufacturers were laid out in a similar array as the previous year with a few changes.  Eventually I spotted a familiar sight the nose of the red race car I test drove last year.  A new stand to the show, Murtaya Sports Cars.
On the stand were Graham, Ben and the Demo car. I’ve been following the build on facebook in its current state, freshly painted in Lamborghini orange pearl mica (a complex colour looking gold in sunlight).  Graham was already chatting to a potential buyer so I waited till Graham introduced me.  Then I introduced myself to Ben and after checking out the demo cars new doors which are now a full door with a lower sill. They have managed it by a complex arrangement of reinforcing the sill and filling it with two part foam.  The stress capabilities of this solution are “off the chart” apparently.  There are a number of other enhancements my car will not have ergo I am a little envious.


I started with the list of questions I had.  Seatbelts – yes they would have to be replaced.  Graham told me where he got the ones for the last two cars he’d built.  The supplier was actually exhibiting outside the hall so I made a note to have a word with them later. Next was the lack of drawings with the dimensions I would need to mark and cut the steering column holes amongst others.  Graham apologised but they had been busy getting the demo car ready for the show and that they would be on the forum very soon.

I also looked at the pads on the feet of the roll bar and they were relatively thin so definitely no lift in the pad would be required.

I looked over the demo car. The engine has had some serious work done on it by Ollie Clarke.  It was now a long stroke engine with modified crank, pistons and con rods increasing the capacity to about 2.1 litre.  So with a larger turbo, and I’m guessing up-rated fuel pump and injectors, new Simtech engine management unit, fly wheel and a host of other modifications should give that motor somewhere near 500 HP.

I was looking at where I could mount the ABS unit on the car and discussed options.  The reality was i would be making a rod for my own back by using the ABS unit.  If I have to relocate it in the engine bay I would’ve had to strip back the electrical harnessing and possibly extend it.  The alternative was to replace the master cylinder and add a brake balance valve for the rear brakes.  The cost was an estimate £30.  The master cylinder would have to be from a version 3 impreza which was the pre ABS version.

I then brought out the mysterious spring that had been mashed up in the rear differential.  Both Ben and Graham looked at it for a moment they hadn’t realised it was so small from the photos I’d sent. Then Graham had a light bulb moment. It turns out it was the spring from inside the oil seal of the drive shaft.  All I would have to do is replace the seal with a new one - that’s a relief.  I wasn’t looking forward to having the differential stripped and rebuilt. A quick check on line when I got home revealed a replacement oil seal was available for about £8.
 
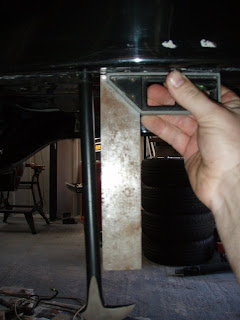
In the first part of the kit there are a number of metal components such as nut plates, mounting points and brackets.  I had managed to work out where most of the metal work went, but there were 3 pieces I couldn’t for the life of me work out where they were suppose to go.  I drew them out on my show program.  One was the exhaust hanger to mount the tailpipes to.  The other two were a matched pair and looked like they mounted on either side of something.  Graham showed me where they went on the red race car.  They actually made up part of the clamshell bonnet hinge where the front end frame meets the bonnets front lip.  As the bonnet and exhaust don’t come with the first part of the kit I’ll store them away for later.

I spent a bit more time with Ben finding out where he came from and his engineering background which was building military vehicles.  We chatted with Graham about the prototype they had in mind. A larger car with a fixed roof based on the Murtaya with a three litre flat 6 engine from a Subaru legacy reworked and boosted with a supercharger.  They want to make it a full production car and at the moment they aren’t sure if they will make a kit option of it.
 
I left the lads on the stand so I could do some shopping round the stands looking at the massive array of tools and parts available.  There were some things I knew I needed.  A set of Holesaws, A heal bar (for aligning holes), a step cutter and a set of fine brushes for detail work.  After I took another turn around the paddock as more cars had arrived.
 
Once I’d saturated myself with all the cars and the infinite variety of colours and styles and had a chatted with a couple of owners I headed back to the Murtaya stand and picked up my shortened prop-shaft from the lads and said my goodbyes.

The Kit car show isn’t like other car shows.  With most car shows the visitors walk away with bags full of brochures and other trinkets.  This show the visitors walk out with rolls of carpet, steering racks, tools, workshop equipment and I was no different with a bag full of tools and a 5ft prop-shaft hung over my shoulder.  One of the car owners I had chatted with earlier walked passed me saying “Now that’s what I call a project!”

Back home I found the oil seal on line, got my seatbelts on order, and at work I finished pressing all the bushes on the trailing arms and the rear sub-frame –That’s the job done.  The suspension arm bolt that still had the inner steelwork of the old bush completely rusted in place got the treatment from an oxy-acetylene torch and some pipe grips.  Easy when you know all the tricks.

Day 34 – 29/4/11 – 1/5/11 Another bank holiday? Really?

Bank holiday weekend and time to get a move on with the car build. I had spoken to Ben earlier in the week who told me that I should be able to hang the front frame on two of the top bolts and then fit the underside bolts.

First of all I need to get the nut plate to fit flush with the bulkhead.  So I am now the proud owner of a Dremel multi-tool with a flexible attachment.  Now the area to cut away is hard to reach with any tool and there is no way I can actually see what I am doing.  So I’m laid flat on my back in the tub with the dremel flex tool fed in the side access hole up to the nut plate area. My hand fills the fixing plate access hole and doing my best impression of a blind dentist.  I’m having feel my way, without slicing my fingers on the cutting bit, and work out in my mind’s eye just what I’m actually cutting.  It took three attempts before the plate would actually fit in line with the holes.


To hold the nut plate in place I put a couple of bolts through the back of the nut plate and put the plate in place putting the bolts through the bulk head and through the front end plate.  Once I had a couple of bolts through the correct way I was able to remove the backward bolts.

With the nut plate now fitting as it was supposed to I decided to have an attempt at fixing the last two front frame bolts on the underside of the tub.  I removed all but two of the bulkhead bolts and slackened them off as much as I dared. Set the bolts in the tub to drop as the holes became aligned (I balanced a lump hammer on the bolt so that it would fall through).  Then with much sweat and applying pressure I finally managed to get the bolts to drop. But when it came to tightening the bulk head nuts I couldn’t get it to line up.  I tried again with more than two bolts but couldn’t get them to line up enough to screw in the nut plates.


It was then it hit me. When the engine is mounted there will be a couple of hundred kilos of weight on the frame.  That should be enough to bring the holes into alignment hopefully.  That in mind I fitted the nyloc nuts to the back of the four nut plates leaving them loose for now.

So back to the roll cage following Ben’s advice I took the seat belts out of storage and presented them to the roll cage.  Now there is a concern regarding the seatbelts.  Regulations state that the belts need to have and “E” rating on the label.  My seat belts are 12 years old so I might have to replace them.  It looked like a tight fit so I figured I will need some assistance.
 
I still had the bushes to fit on the suspension arms and trailing arms.  I popped up to my parents to use the vice in my dad’s workshop.  Six of the bushes were easy and with a bit of soapy water my dad and I were able to press them in with no problems.  I moved on to the rear hub training arm bushes which after a couple of attempts I found was easy enough to use a piece to stub bar, a metal plate, a few spread washers and nuts to “pull” the bushes into place.

The outstanding bushes for the sub-frame car mount have finally arrived.  The bushes weren’t unreasonable but the cost of shipping them over was extortionate and I was still charged even more by the courier for import tax.  But at least I’m not held up anymore.  I will need to press then into place with the press at work though.
 
My brother Drew was up from London and popped in to give me a hand.  He’d given me a set of ratchet ring spanners for my birthday so I put him to work with them tightening the nylocs on the nut plates I had left loose.  Then we went on to the roll cage fastening the seatbelts on to the bar and we realised unless I raise the pads by an inch there was no way these were going to fit.


For the next hour we tried to get the circlip out of the rear differential unit with pliers, screwdrivers failing badly.  We still found a couple more pieces of the mystery spring that came out with the drive shaft.

Tuesday, May 3, 2011

Day 33 – 23/4/11 I’m building a car... at last

Finally I have finished painting. Now I’m left with nothing to do but start putting the car together.  I sorted the garage out a bit and gave my mate Dan a call to ask for his assistance.  The first jobs are to mount the front end metalwork to the tub and mount the roll bar before the fuel tank goes on.

I went back to the facebook photos of the demo car currently being built and saw that an area of the bulkhead and drive tunnel was covered by heat reflective tape.  Dan and I fitted the tape.  The tape supplied wasn’t enough to cover the area shown in the demo photos being just over a metre short.  Fortunately I had a spare roll I had been advised to use on the roll bar feet. Taping done, we presented the front frame to the bulkhead and the nut plates to the back side of the bulkhead.  Problem no.1 one of the nut plates will not fit flush to the bulkhead.  The fibreglass resin was fouling so it was impossible to align the pre-drilled holes to the nut plate.


Drivers side mis-shape

passenger side - and what the drivers side should look like
The fouling resin is going to be very difficult to get at, if at all.  I could barely get my phone in to take a picture of the problem which is obscurted by the internal webbing.  Alternatively I could cut the nut plate back as much as possible. I suspect I will have to do both and cut part of the webbing to get access to the fouling piece.

Problem no.2 is a bit more fundamental.  There are 18 fixings holding the front frame on. Nine bolts on each side, five at the top, three in the middle and one underneath, which is also one of the gearbox sub-frame mounting points. When we aligned the top five the bottom fixing point wouldn’t fit under the bulkhead.  And if we put the bottom fixing under the bulkhead the top fixings were out by about 6mm.  Dan and I struggled for about an hour before he had to head off (he’s new to being a dad and time is no longer his own).  I gave it some thought and came to the conclusion the underside fixings are the most important as they relate to the drive chain and engine mounting.  Left to my own devices, which involved sitting the front of the metalwork on the workmate and laid on my back, after much straining and cursing, I managed to put the underside bolts in place temporarily.  Once tightened I could see that all the other pre-drilled holes were about 3-6mm too high.  The alignment side to side was fine but they were still too high.  I think I need a word with Ben to see if I can slot the holes a little.


In the meantime I moved on to the roll cage. After my last discussion with Ben I took his advice and got hold of some glass fibre based bonding compound.  Ben Recommended U-Pol SMC but I was only able to get hold of the Isopon Equivalent P.40 which, I was told, is an equivalent product.

With a damp sponge I cleaned the interior in order to mark the fixing points for the roll bar.  I squared up the roll bar as best I could but with the interior of the car being glass fibre and resin and I struggled to find datum point on each side to measure from and ensure the bar was square on to the car.  I thought I had it about right, within a millimetre or two, based on the roof fixing points on the windscreen frame the top of the bar and marked it up ready to use the bonding compound to create pads for the roll bar to sit on.

 It was after lunch I went back to it and noticed from the side that it wasn’t as square on as I had thought.  I suspected it had shifted but the feet were still square in the marked areas.  I found a straight edge (some square bar about 6ft long) and put it on the tops of the door edges figuring the door frames must be equal and square because the doors have to fit with a relatively close tolerance.  I was out by more than I would have liked.  Now the simple answer is to bring the roll bar forward to the straight edge but that would put roll bar’s rear feet off the back of the car.  I went back to the Facebook Photos of IBIS White and it does look like the roll bar is set back from the door line (where I lay the metal edge) if only by 25-30mm.  But photos can be deceptive - another problem to speak with Ben about.

So I spent the rest of the day putting other bits and pieces together cleaning nut and bolt threads and applying copper grease.  I took a closer look at the steering rack and the bushes.  A bit of cleaning revealed that one of the bushes was perished. So that’s another set to order.