Sunday, March 13, 2011

Day 26 – 12/3/11 Inlet manifold and a warm day at last.


Earlier in the week I took a day off to work with Kim and we removed the inlet manifold and cleaned up the springs so that Kim can take them to college.  The flaking paint on the manifold was greasy and literally with every touch oily paint would flake off.  I would have liked to have cleaned it all off before removing it but with the fuel lines injector assembly and breather pipes all fastened to the underside of the manifold.
 
I have to admit being a bit nervous although I’m taking photos there seems to be a lot of pipes being pulled apart.  To be honest a lot of it does make sense the breather pipes and for want of a better expression balance pipes.  With the engine being turbocharged there are parts of the engine that need to be at the same pressure as the pressure on the inlet manifold when the turbo is spun up on boost.

With the whole inlet assembly unbolted and unplugged we gently lifted it off the engine.  Even though we tried we still managed to drop some flakes in the inlet ports.  I went inside and grabbed the vacuum and we managed to suck the debris out.  There was one minute piece we couldn’t get out but I improvised with a thin paint brush lightly dipped in oil.

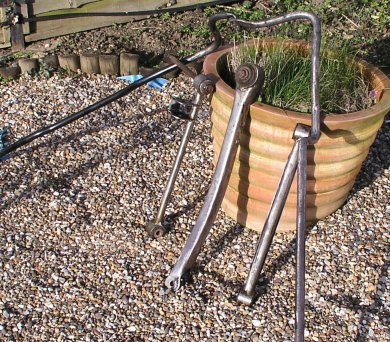
I then stripped the injector assembly from the manifold. I had unbolted it and tried to lift the injectors out, but they didn’t want to budge.  I was concerned that there might have been some other fixings under the injector housings but unable to find anything I put some long nose pliers under the pipe and the injectors lifted out of their seats.  Then it was out with the wire bush I managed to get about 60% of the paint off with no issue.  I plan to get the manifold bead blasted and crackle coated in red, obviously.


Graham set me an email confirming that my bushes would be en route.  Unfortunately, the suppliers did not have the full kit of the bushes Graham was ordering for me so they have agreed to send me an alternative kit of higher performance.

Today is has warmed up and at last I can get some painting done.  Two jobs at the top of list are the fuel tank and Radiator assembly.  I took the tank outside it looked a little grotty.  So chisel and wire brush at the ready I took the rust and greasy paint off the top of the tank.  I gave the top of the tank a going over with degreaser and let it dry in the sun. The underside has a thick kind of bitumen-esque coating which I will wash and brush it then decide whether to put a coat of paint on it.


Next was the Fuel Filler pipe.  This pipe was the bane of my life in days 18 and 19. It took ages to remove and I was a bit concerned at its condition but once I got the wire brushes on it I came up fine.  Out of curiosity I took the new Aero Filler cap and the largest of the short rubber link pipes and with a splash of WD40 managed to squeeze it on to the end of the fuel filler pipe and connected the aero filler cap all fitted well, just a couple of jubilee clips will finish it off.


Then it was on to the Radiator and Fan mounts.  The fan mounts were already half painted so I painted the remaining side and hung them to dry. I brushed and sanded the top and bottom brackets, for the paint to get purchase, and degreased them and after they were dry painted them with a coat of paint.

Monday, March 7, 2011

Day 25 – 6/3/11 Easy tiger...

Not a lot to do other than get rid of the grot.  De-rusting and cleaning the remaining suspension parts.  The tub sat in the garage is a real tease I want to get started on building the Murtaya, but I haven’t got the parts readied, its still too cold to paint and it is really frustrating.   The bushes are on order and still haven’t managed to work out an extraction tool for them yet. The weather was cool but with little chance of rain forecast, it was out with the workmate and wire brushes.


Why do I mention the Workmate? Well Ron Hickman inventor of the Workmate died earlier this week age 78.  Hickman had a life-long love of cars, and also designed the original Lotus Elan, the Lotus Plus 2 and the Europa. (http://www.theregister.co.uk/2011/02/18/workmate_lotus/).

So it was out with the angle grinder with a stiff wire brush head.  Things were going well and in no time I was on the third piece until there was a ping and Ouch! I think I might have been a little over zealous with the angle grinder and one of the wire bristles was now embedded in my top lip like a whisker.  It was then I noticed the car cover on the donor car I was working beside was sprouting it own set of metal whiskers. I pulled out the whiskers both my own and the ones on the car cover.  I decided to tone it down a bit and switched to the drill and an abrasive disk.

I went on to the Anti roll bars.  The Front was in Good condition and with the exception of the ends.  The middle section still had the original paint on it which I’ll sand down to take the gloss off before painting.  The rear anti roll bar offside bracket as true tradition with all aspects of the offside rear quarter of this car was a sod to undo and I ended up grinding the top of the bolt off.  The bracket was already torn from when I took it off the car.  Graham has mentioned that I wouldn’t need to rear anti roll bar because of the new and improved coil over system.  I’m still going to paint the bar but I will decide later whether I make/acquire some new brackets.


Last thing to be done for the day was the rear differential nose mount. Which is not an insubstantial piece of metal I only managed half of it before the light was fading.

Tuesday, March 1, 2011

Day 23 – 22/2/11 not the garden variety bushes

I spoke with Graham at work today and after a bit of discussion came to the conclusion that replacing the worst of the bushes probably wasn’t the best of ideas so the workload has suddenly increased. And I may need to get hold of a press.  Kim is on holiday this week, Cyprus I think.  But I suspect once she is back at college after half term the college’s facilities will prove most useful.  There are enough tips and tricks on You tube that I should be able to remove some, if not all, the old bushes.  Graham said a full Poly bush set would cost about £360 and I found a so called full set on Ebay for £370.  I say “so called” because whilst the set looks comprehensive the rear sub-frame mounting bushes and grommets do not appear in the kit content list.  Graham said there weren’t any bushes mounting the sub-frame to the chassis.  However Polyurethane bushes have a longer life than the rubber variety, a better performance and one thing less to go wrong later.


Graham sent me an email confirming the set I found on EBay were the same he would supply, only he can supply them a little cheaper.  A friend at work reckoned he might be able to get the set cheaper so I figure I’ll give him the chance but will probably be putting another substantial amount in Grahams account early next week.

Day 22 – 22/2/11 Jacks back

My third replacement jack for the engine crane arrived today and as soon as I got home I was in the garage setting the jack in place. I crossed my fingers and started pumping.....Yup there she rises! I hooked up the engine and yup! It lifted, let’s hope it stays that way.

Now everything is in the garage for the first time in weeks I can start breaking the major components down for restoration. I was like a dog with two tails I didn’t know what to start on first.  I decided after having numerous corrosion related problems with the back end of the donor car I decided to make a start on with the rear sub-frame assembly.

First was the off side Brake splash guard.  The near side had already been ripped off by a previous owner and the remaining guard was so rotten I put my finger through it.  It wasn’t bolted to the hub assembly it was spot welded.  I ripped it off with a screwdriver.  It literally disintegrated.


I cracked the two nuts holding the rear of the differential to the sub frame one nut loosened and the other loosened the shaft inside the diff.  Then I went to work on the Diff nose mount cracking the nuts under on the underside and then the bolts on the side. The bottom plate came free and the whole nose mount came away. Not sure what I do about the taking off the bottom plate on the Nose mount.  The nuts are well rusted I might do better cleaning as much and painting over them.

I was then able to undo the suspension arms on both sides of the diff and with that the sub frame was free.  The rear hubs now need the arms removing.  First the trailing arms and then the arms lower arms.  I was looking at the rubber washer/grommet that were used to fix the sub-frame to the car.  The washers may brush up but the rubber grommets were perished and I’m not sure I can use them again.

I cracked the suspension arm bolts and eventually freed them from the hubs. The next problem was the handbrake cables and ABS sensor cabling.  They were attached to the trailing arms and arm mounts with corroded brackets and bolts.  I managed to get the fixings off the trailing arm but the mounting bracket will need some extra attention.
 
Looking at the suspension arm bushes I noted some were fine and would handle a bit of cleaning.  But others were showing their age.  I think basically they are all within tolerance since that the donor passed its MOT in October and there is no movement in them.  However how much life there is left in the shabbier bushes is another question.


I think I will need to have a quick word with Graham.  A brief look on t’internet told me full set of poly bushes will set me back £400 online and then there will be the trouble of removing the old bushes and fitting the new ones, some of which may require a press.


The majority of the rear sub parts separated, except for the hubs and diff, I took one of the trailing arms and cleaned it up with a wire brush head on an angle grinder and then coated it in rust remover gel to see how it comes out.