Saturday, July 30, 2011

Day 45 11-7-11 Bubble trouble


Earlier in the week I recruited a couple of friends Russ and Carl to assist moving the tub on the stand.  Russ turned up with his wife Claire who confessed she couldn’t see any difference from the last time she had visited – That was when Russ had helped me lift the rear differential out from under the donor car.  In order to fit the “hockey stick” fuel line cover the tub needed to move.  It was only a couple of inches, but it was necessary.  I untied the front end from the stand and it was clear the tub was back heavy as the front end lifted.  Carl held it in place whilst Russ and I took the weight at the back then we all lifted.  It took a couple of attempts to get it right and this time I used 2 pieces of rope to tie the front down.

Having spoken with Graham about the fixing spacing I decided to space them approximately 250mm apart.  Technically cables and pipes are required to be fixed every 200mm (8” in old money). However the hockey stick isn’t technically a pipe it is a cover.  So my decision was to have a max spacing to 250mm between fixings. Carl and I measured up from the front end but couldn’t get a reasonably spaced fixing at the rear. So we marked up the frontend up to the bend and then measured the fixing points from the rear up to the bend.  Then laying the pipes in the cover we held it in place and drilled pilot holes and added the self tappers and called it a night.

Carl had also spent some time checking my measurements and it would appear my idea of a right angle is somewhat lacking and one of the points for the hand brake I had marked was out by a couple of millimetres. Now corrected I looked to the “pinch”. The pinch is the best way I can describe it. It is a crest of resin and fibre in the centre of the tunnel.  By all accounts it should not be there and Graham confirmed it could be removed. I took the Dremel with a cutting disc and sliced around it underneath there was a void, a bubble if you will. I cleared the area and then thinking back to my sailing days I tapped around the sides with the back of a screwdriver.  One side sounded different. The top layer was delaminated from the base layer.  I tapped further it was not massive area but it needed cutting back and re-bonding.  I cut the top away one small piece at a time until I couldn’t put a screwdriver blade between the top and bottom layers.  I have some glass fibre mixed resin left over from the roll cage mounting pads that should finish the job off.


Next it was the handbrake cable grommets no problem with the aid of a 20mm hole saw and the Dremel.  I ran the handbrake cables through the holes and looked at the cable mounts.  The clips were corroded so I stripped them back and treated them with metal prep and a couple of coats of paint.  Whilst I had the wire brush head on the grinder I looked to the brake disks that had been sat on the garage floor since I took them off the donor car.  I cleaned them off and had a look at the state of the discs and something looked wrong the front discs were fine but the inside face of one of the rear disks was a mess.  Now I know when I bought the donor car I knew the brakes had been overhauled and the disks had been skimmed.  That was one of the reasons for choosing this donor.  But the inside face of one of the rear disks clearly had been missed.  I will have to see if I can get that disk face skimmed on a lathe.


Day 44 – 29/6/11 Its a needle in a haystack time – I knew this would happen

With the outside temperature rising into the thirties I expanded the holes from 8mm to 12mm using the step cutter and with the aid of a heal bar managed to line up the holes enough to get the bolts through. I put all the hub bolts in place it all fitted fine. I gave the hub a “strong tap with the rubber mallet to see if the shaft would slip over the circlip in the differential and into the correct position.  It didn’t budge.  I decided I would pay it further attention later with some timber and a bigger hammer and a cooler temperature.  I have a mat to lie on when working under the car but the garage was like an oven. And it was more comfortable to lie on the cooler concrete floor.  I even opened both garage doors to try and get some air flow through.

For now it was on to the bottom brackets on the diff nose mount.  They lined up no problem. I was concerned they were a little low and the spread washers on the other side would foul with the floor but need not have worried.
    
I climbed into the tub and armed with a tape measure, a steel rule, a silver paint pen and a pencil.  The MSC Forum had a drawing of the holes that need cutting for the central tunnel. These constitute two grommet holes for the handbrake cables, Handbrake cable clamp, handbrake mounting holes, gearshift rear mount fixing holes and gearshift access hole.  First is a Line straight across the rear of the tunnel. That’s straight forward.  The next is a centre line along the tunnel.  This is more by eye than anything.  With the tub being a manual layup there are no reference points to measure from to get a centre line.  For the handbrake this is a more aesthetic the cables have a small amount of “play”.  I suspect the gearshift rear mount is a different concern but there are bushes that allow for a little play and then there is the gearshift.

I found the gasket clamp and laid it on the tunnel.  The gearshift gasket has two locating points on the clamp on the centre line of the clamp. I tried numerous different points to find a measure from to get a centre line.  For some reason I was always 5mm off.  Side of the tunnel, side of the tub it made no difference.  It was always 5 mm out.  So this is going to be a “by eye” measurement.  I marked up the best centreline I could and measured off the centres for each hole.  Then I got the new handbrake out of its box -A Rover handbrake.  I wondered why? but the different method of adjustment and the length of the link cable soon gave me the reasons why.
Right now I need the handbrake cable clamp.  Now where did I put it... I went through every box of gear I had stored from the donor – no joy.  Then I tidied the whole garage and went through each box again including my tool chest - still no joy.  Where has it gone? I know what it looks like, I remember taking it off the donor car.  Two pieces of metal, fixing holes top and bottom with the top piece bent at each side to capture the outer handbrake cable sheath.

The scorching temperature of the garage and the lost handbrake clamp did a bloody good job of winding up my frustration.  I knew I’d lose something from the start.  I’d tried so hard to label, tag and store everything I took off the car so where in Hull did I put it!  I stood there soaked in sweat my language becoming some would describe as colourful, bordering on the flouresant.

There was one last place to look - The donor car.  I couldn’t believe I’d leave it in there -I knew I needed it.  I even remember taking it off.  I took the canvas cover off the donor car and started removing the doors, glass, interior panels, air ducts, speakers and redundant steelwork.  After emptying one side with no joy I started on the other side.  Eventually as I removed the last piece of duct there it was in the back of the passenger footwell.  The two pieces one on top of the other as intended, staring up at me.  I could almost see it smiling up at me – you bugger!

I put everything back in the donor car, pulled the cover over it and called it a day.  Still at least I had cleaned the workshop.

Day 43 21/6/11 It’s all in the balance

Dan popped round to assist with the outstanding bolts on the rear strut tops. It took the two of us and some tape on the ratchet spanner.  Now it is on to mounting the differential. I hoped to mount the Differential nose bracket first and fixed it in place then when looking at the differential itself we decided it would be easier to put the nose mount on the differential off the car and fit the whole lot as one.

We were right eventually. With the nose mount now bolted to the diff we put it under the car. We discussed how we would lift slide the rear bolts into the bushes and hold it in place.  In order to lift it we had to move the tub back on the mount about 4 inches. We were about to lift it into place when I had a thought.  The diff with its nose mount and the hubs represent a sizable chunk of weight. I gently pressed down on the rear of the car and the front of the car lifted. Doh! I dug out a length of rope and tied the front frame to the wooden framework the tub was sat on.  This is obviously a temporary solution till the engine is fitted but I can’t help wondering if it will tip the other way once the engine is fitted.
  
We lifted the diff tail first into the new bushes on the rear sub-frame we then stacked 3 wheels under the diff nose and set about fixing the nose bracket.  Once the Diff nose bolts were in place I tightened up the rear diff bush fixings.  New minor problem – the new bushes appear to be thicker than the original bushes.  There appears to be about 6mm difference (see the photo).  Everything is tight and solid but a little voice in the back of my mind says the IVA inspector will frown upon this and I may have to replace the stud bars with something longer.


We moved onto the trailing arm mounts with the aid of a heel bar we were able to line each bolt up on one side the other side was going to take a bit more work.  It was getting late so we called it a night.

Day 42 18/6/11 Whoops I over done it! and my last show


I decided to crack on and with a heel bar and some elbow grease I removed the spacers used on the donor cars brake pedal that were welded to the bulkhead.  Once removed I cleaned up the spacer the spot welds on a bench grinder.  Right, Put them on the brake servo and refit the brake pedal.  I fastened the steering column to the bracket and offered it up again.  I still was not happy, the steering column was too far to the left and it would be impossible to drive.  I double checked the fitting  but the side of the bracket was still fouling the clutch bracket. I looked at the bracket again and went back to the internet (facebook photos).  The photos showed the bracket fitted to the demo car looked the same but the angle of the side piece appeared to be the one from the opposite side of the bracket.  Back to the car and the bracket.  My thoughts were that the bracket, which was made from one piece of folded steel, had been folded and welded up the wrong way.

I took some photos and sent them off to Graham and Ben to see if they can shed any light on the issue.  I still can’t reach the last bolts on the rear suspension top mounts.  Need someone with longer arms.  Time to make a few calls.

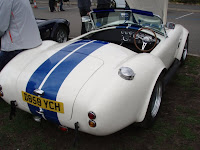
The Newark kitcar show is on at the agricultural show ground.  The weather is all over the place with heavy cloud and rain showers but I decided to go mostly because I wanted to find someone who could potentially paint my car when the time comes and also that I get some ideas for a colour choice.  The turnout wasn’t as good as it had been at Stoneleigh, I expect the weather played its part with numerous car cockpits under golf umbrellas or in some cases the whole car wrapped up in its “sleeping bag”,  The show didn’t have any sprayers showing but I got a few photos of some nice cars.


There were a few interesting colours and combinations including a light blue pearlesant cobra which on closer inspection revealed that it was a film applied to the bodywork.  It looked awesome until you got close up then you could see the seams and overlaps.  The favourite colour for my car is looking like British Racing Green but with the variety of BRG available I’m looking for options. The mica pearl effect is very subtle but I haven’t seen it in a dark green. The current favourite is the Lotus metallic green.  I’ve seen it on the Evora (albeit with twin yellow stripes) and the Elise 
and think it will look great and kind of reminds me of my first Impreza.

I went passed the Italian replicas some of which I recognise from Stoneleigh.  One of the guys I got chatting to, whilst admiring some very nice cars, couldn’t understand the reason for the cars as they were only Toyota MR2’s underneath.  Later I got chatting to one of the owners who had a Lamborghini Diablo. However this was no “dressed up Toyota”.  Painted in the mica pearl orange, as seen on the Lamborghini Aventador and MSC’s new RTS demo car (which looks cool), under the hood he had fitted a 5 litre V12 BMW engine with a couple of turbos bolted on for that little extra lift.  He recently had a new clutch fitted. As he told me shortly after its first engine management setup, with the engine only pushing out 400hp, the old clutch had given in and shattered whilst he was driving it. The new clutch should take up to 700hp and he is having to do extra workouts in the gym to operate the clutch. His plan was to run it for the summer and for the winter was to change the gearbox to a Porsche and tune the top end of the rev range.


Alas there were no Murtayas to be seen, something that I will have to rectify next year. MEV have produced a kit that from the online photos I thought might be direct competition for the Murtaya. But after seeing it in the flesh so to speak there’s no competition.  The MEV X5 is a redressed Mazda Mx5 which I’m sure would be fun but not the power of the Murtaya.  It also doesn’t have the detail either and you lose the boot.  Sure it is cheap, there is no IVA test required, it’s a relatively straight forward panel replacement which appears to be growing in popularity due to low cost and complexity as well as laser scanning giving near perfect replication of body panels.

When I got home there was an email from Graham confirming my suspicion that I had been given the wrong part.  The part that had been delivered was for a left hand drive and he would arrange a replacement on Monday.  Graham also included photos of the pedal box and the column mount which highlighted a screw up on my part.  I did not need to part the accelerator pedal from the brake pedal.  Also there are only two fixings onto the tub not four as I previously thought.  Also the spacers I took from the donor car were not required the spacers on the clutch pedal look like they need to come off.  None of these are major issues and all are easily restored.

Day 41 – 15/6/11

This evening I did a little adjustment on the holes I cut out on the last session and the first rear suspension top was done.  I’d like to say the second was done in half the time but it took just as long. However, not as long as I took struggling with actually fastening the nuts in place. Two nuts went on with no real issue but the third is very close to the top of the tub and it is a tight fit.  I eventually gave up on the third simply because my arms just aren’t long enough and fingers too thick.  This would have to be a job for Kim the next time she comes up as she sports a distinctly slimmer figure and more nimble fingers.


small cameras can get in all sorts of places my hands can't

I moved on to the steering column again.  I had spoken with Graham (MSC) who said they were aware of the problem and that I should be able to mark up and improvise the holes.  So I set about mounting the brake pedal.  The accelerator and brake pedals are made one by a spot welded plate.  First job is to drill out the spot welds.  No problem, and the two pedals are parted. I mounted the brake pedal to the servo unit and then looked to the steering column bracket.


I held it up to the underside of the dash laid on my back in the tub trying to get the bracket dash fixing holes and the pedal mount holes to line up.  Not a chance.  No matter how I tried I couldn’t get four fixings on the dash and three fixings on the pedal brackets.  The only way I was going to mount it on the dash is if I space off the brake pedal from the bulkhead.  I went back to the donor car with a set of calipers.  On the donor car the brake pedal was spaced off the bulkhead by four 20mm spacers welded to the bulkhead.  So I need a few spacers.  I called it a night.